Veggie Scrap Broth
To me, veggie broth is the ultimate “something out of nothing” and one of the best ways to save money, reduce waste and make something delicious.

Watch out folks! Are you ready to make the delicious food out of something you previously threw in the trash? I knew I wasn’t for a long time but once I started doing this, it became a natural part of making the most of every bit of my food. People have been making vegetable broth out of food scraps since, well broth was broth… but now with convenient packaged options it’s easy to grab some at the store and forget how broth has always been a way to use up the last bits of veggies. It’s a great way to make something delicious from the parts of the vegetables you’re not using or have gotten tired, and it costs basically nothing.
I consider broth to be a kitchen staple and having some on hand means you’re always ready for a warm soup throughout the winter. I use this broth in pureed soups, noodle soups, really anytime a recipe calls for stock or broth, I use my veggie broth made from this recipe as a replacement. It’s vegan, delicious and I can adjust the flavors depending on what I’m looking for in each batch. Broth can be used as a base for soups, but it can be incorporated in other parts of your cooking as well! You can use it to make rice, quinoa and other grains, adding some mega depth of flavor to these staple foods.
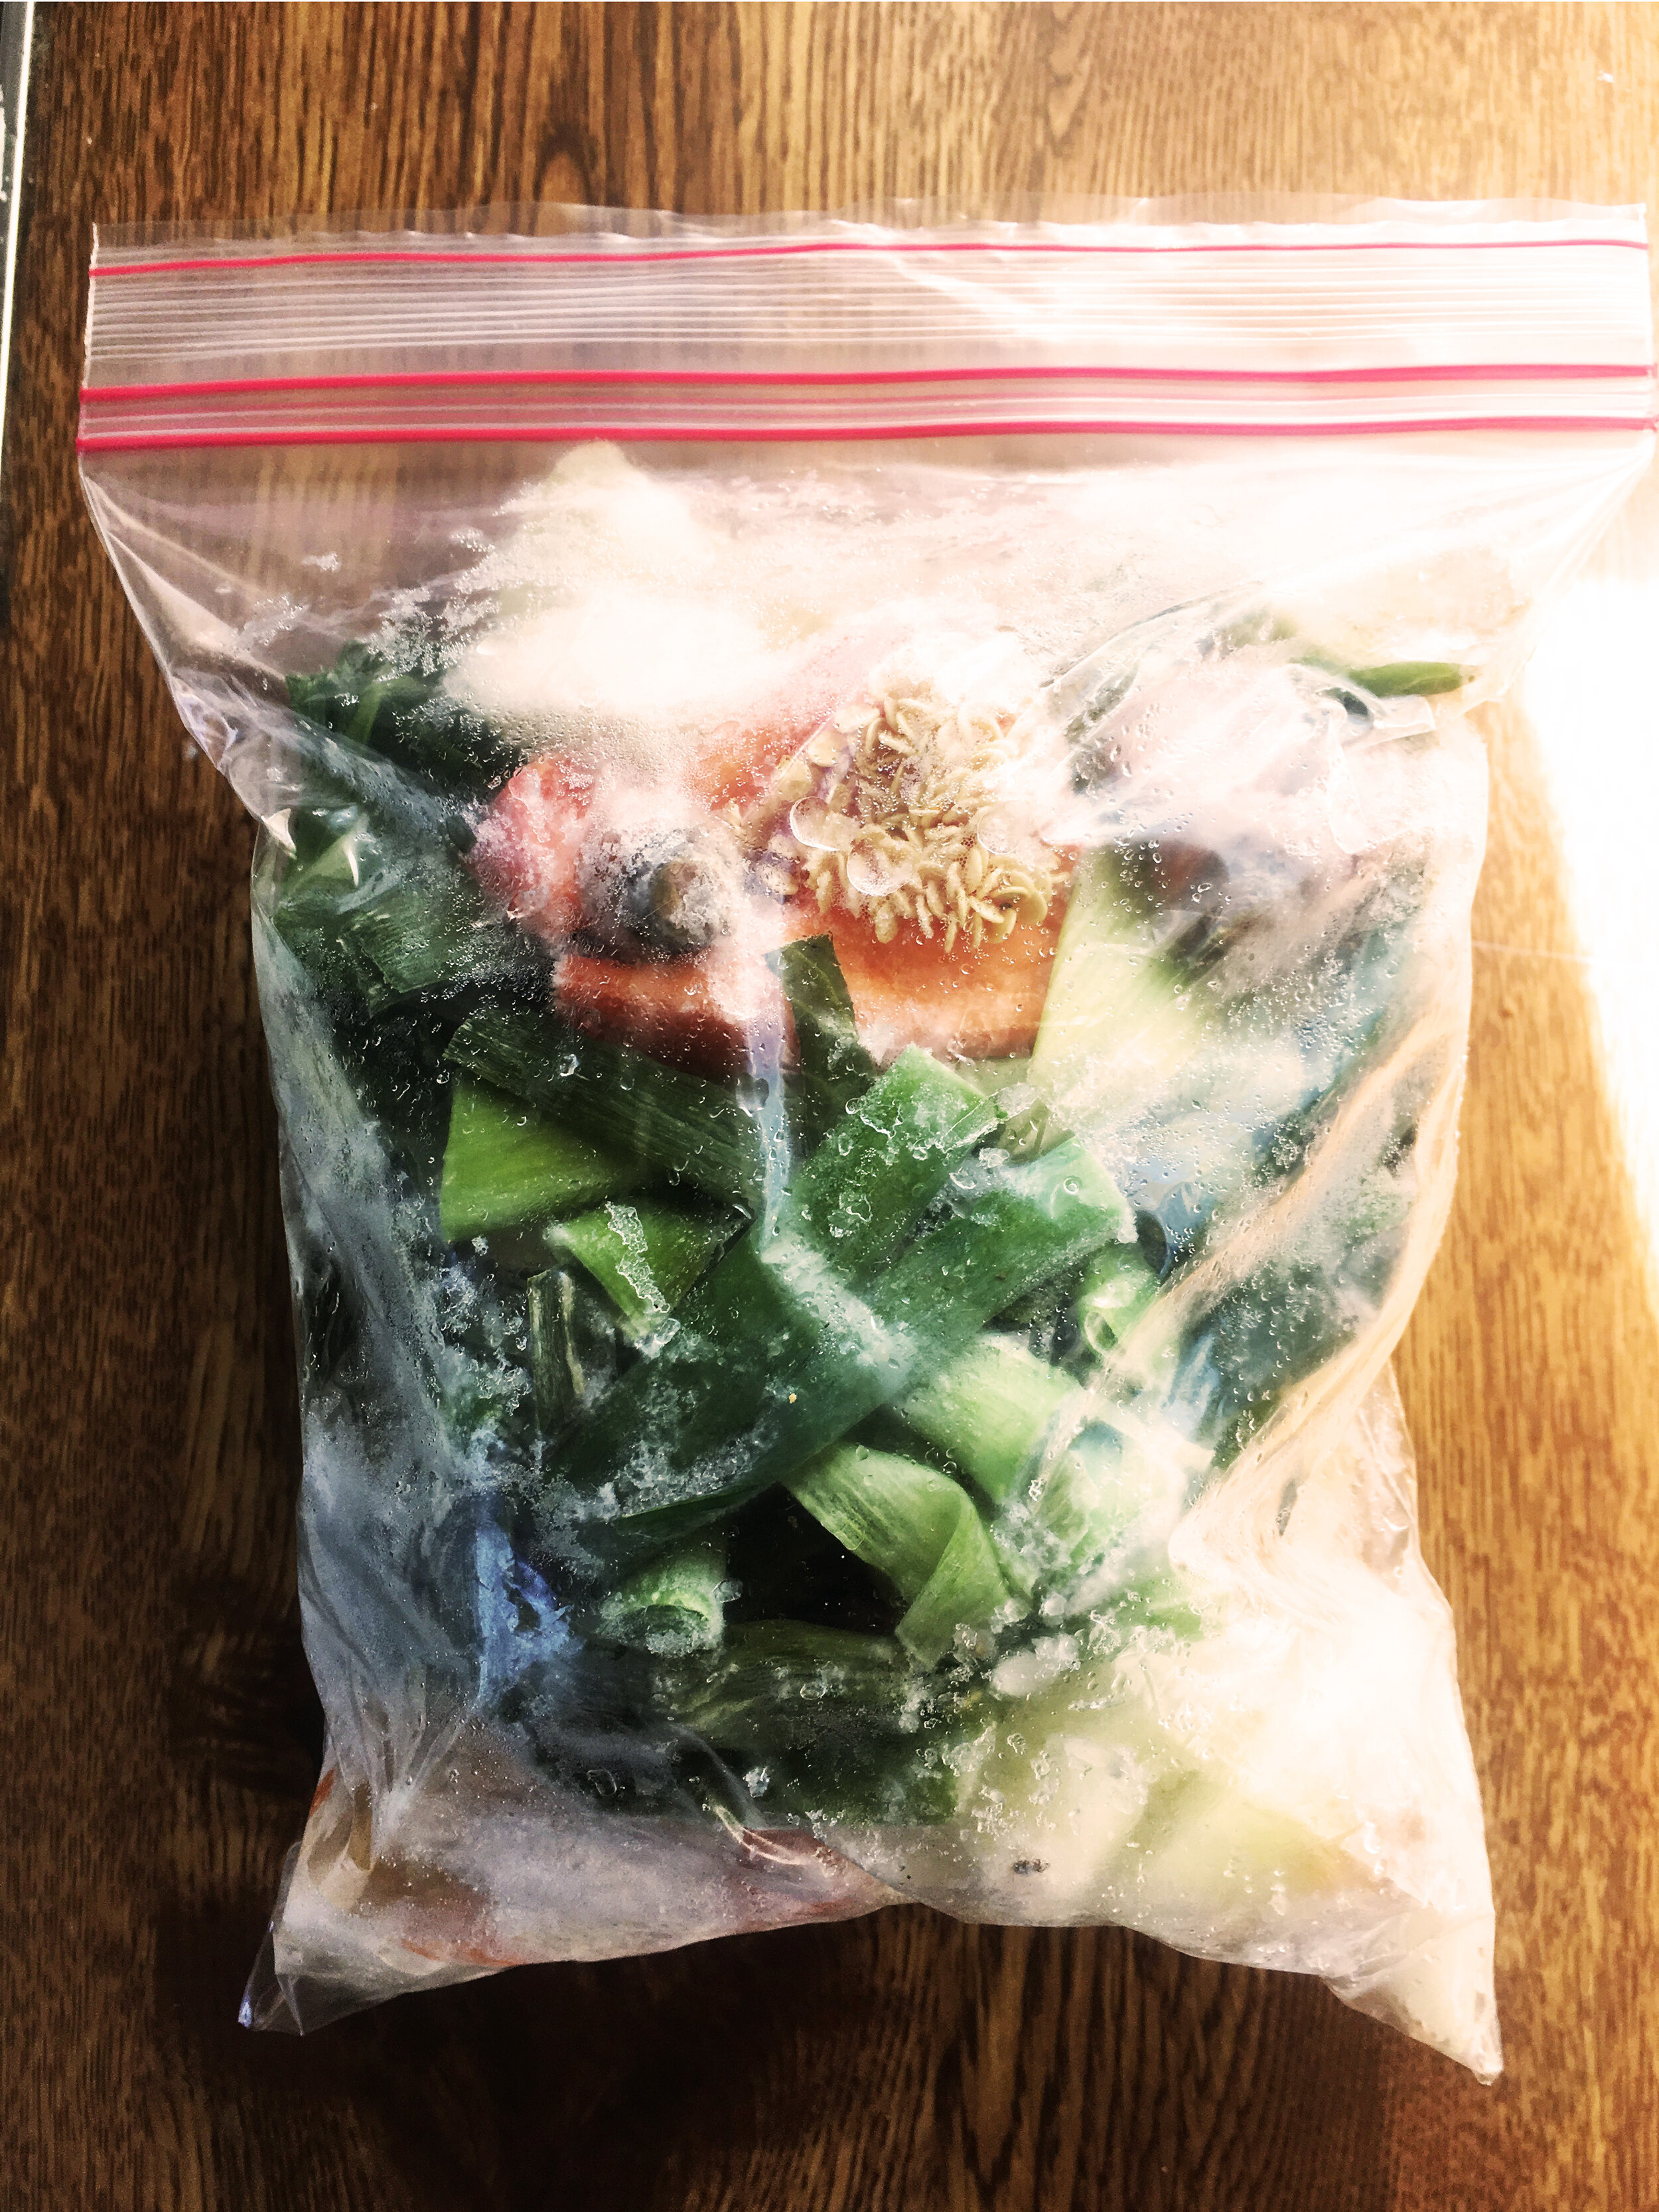
For collecting your scraps, I recommend keeping a labeled scrap collection container in your freezer all the time so you can always add bits and ends as they collect when you’re cooking. Then everything is ready to make stock whenever you are. You can use a ziplock bag (and reuse it over and over of course!), an old plastic container or anything that works for you. Shoot for about a gallon and fill that sucker to the brim!
Stock and broth are often used interchangeably in daily conversation, so what’s the difference? Stock is simply made from bones and vegetables (and cooked for longer), while broth includes spices! While we don’t get suuuuper picky about technicalities on Grounded Grub, we used “broth” for this article because we’re only using vegetables and we love the spices!
PS: I know this recipe is very flexible and may even seem vague at times—that’s the point. This recipe and sustainable practice of repurposing food waste is supposed to make the most of whatever you have on hand. So experiment, smell your spices and follow your nose towards some delicious broth!
Note: I learned how to make stock and broth from my local extension service agents and from this article. Thank you so much!
Ingredients
About 1 gallon Vegetable Scraps : Onions, carrots, celery (“mirepoix” as the french say) and garlic are nice for that standard stock taste, so they’re great to have, if you can. Beyond that, it’s up to you, and what scraps you have on hand! Potatoes, leeks, bell pepper, sweet potatoes, green onions, mushrooms, even beets (they’ll turn your broth a fun red!), are all options that will add to the flavor of your stock. Brassicas like cabbage, broccoli and brussels sprouts are not recommended as they can give things a bitter taste. You can also save herbal greens like parsley, chives, cilantro, etc. to add to your mix. Veggies about to go bad are great to add as long as they haven’t started growing mold yet… All parts of the vegetables are useful and can add to the depth of flavor—it’s actually the outside skin of onions that give broth it’s characteristic brown color!
Spices : Some whole peppercorns, a couple bay leaves, a sprig of rosemary, and thyme are the most common. I like to add a couple tablespoons of salt, but that is up to you and your preferences. Depending on what scraps you have, you could add garlic, onion, parsley, or other aromatic ingredients to round out your flavors. You could use ground spices, but the whole ones tend to release in a way that gives your broth a deeper flavor. Ground spices are also harder to filter out and can lead to cloudy bits in your broth rather than being clear. I personally don’t mind so I usually use whatever I have on hand.
1 tsp Kosher Salt : or more! Salt to taste at the end.
Other supplies: You’ll need a large pot (6 quarts or larger) or a crockpot/instant pot to keep things cooking for a long time. You’ll also need a strainer, and some people like to use cheesecloth or a coffee filter to get out the super small particles but that’s up to you.
And that’s it!
Preparation
After washing your vegetables for other dishes, peel, slice, chop, and throw those peelings, leaves, and stalks into your freezer container.
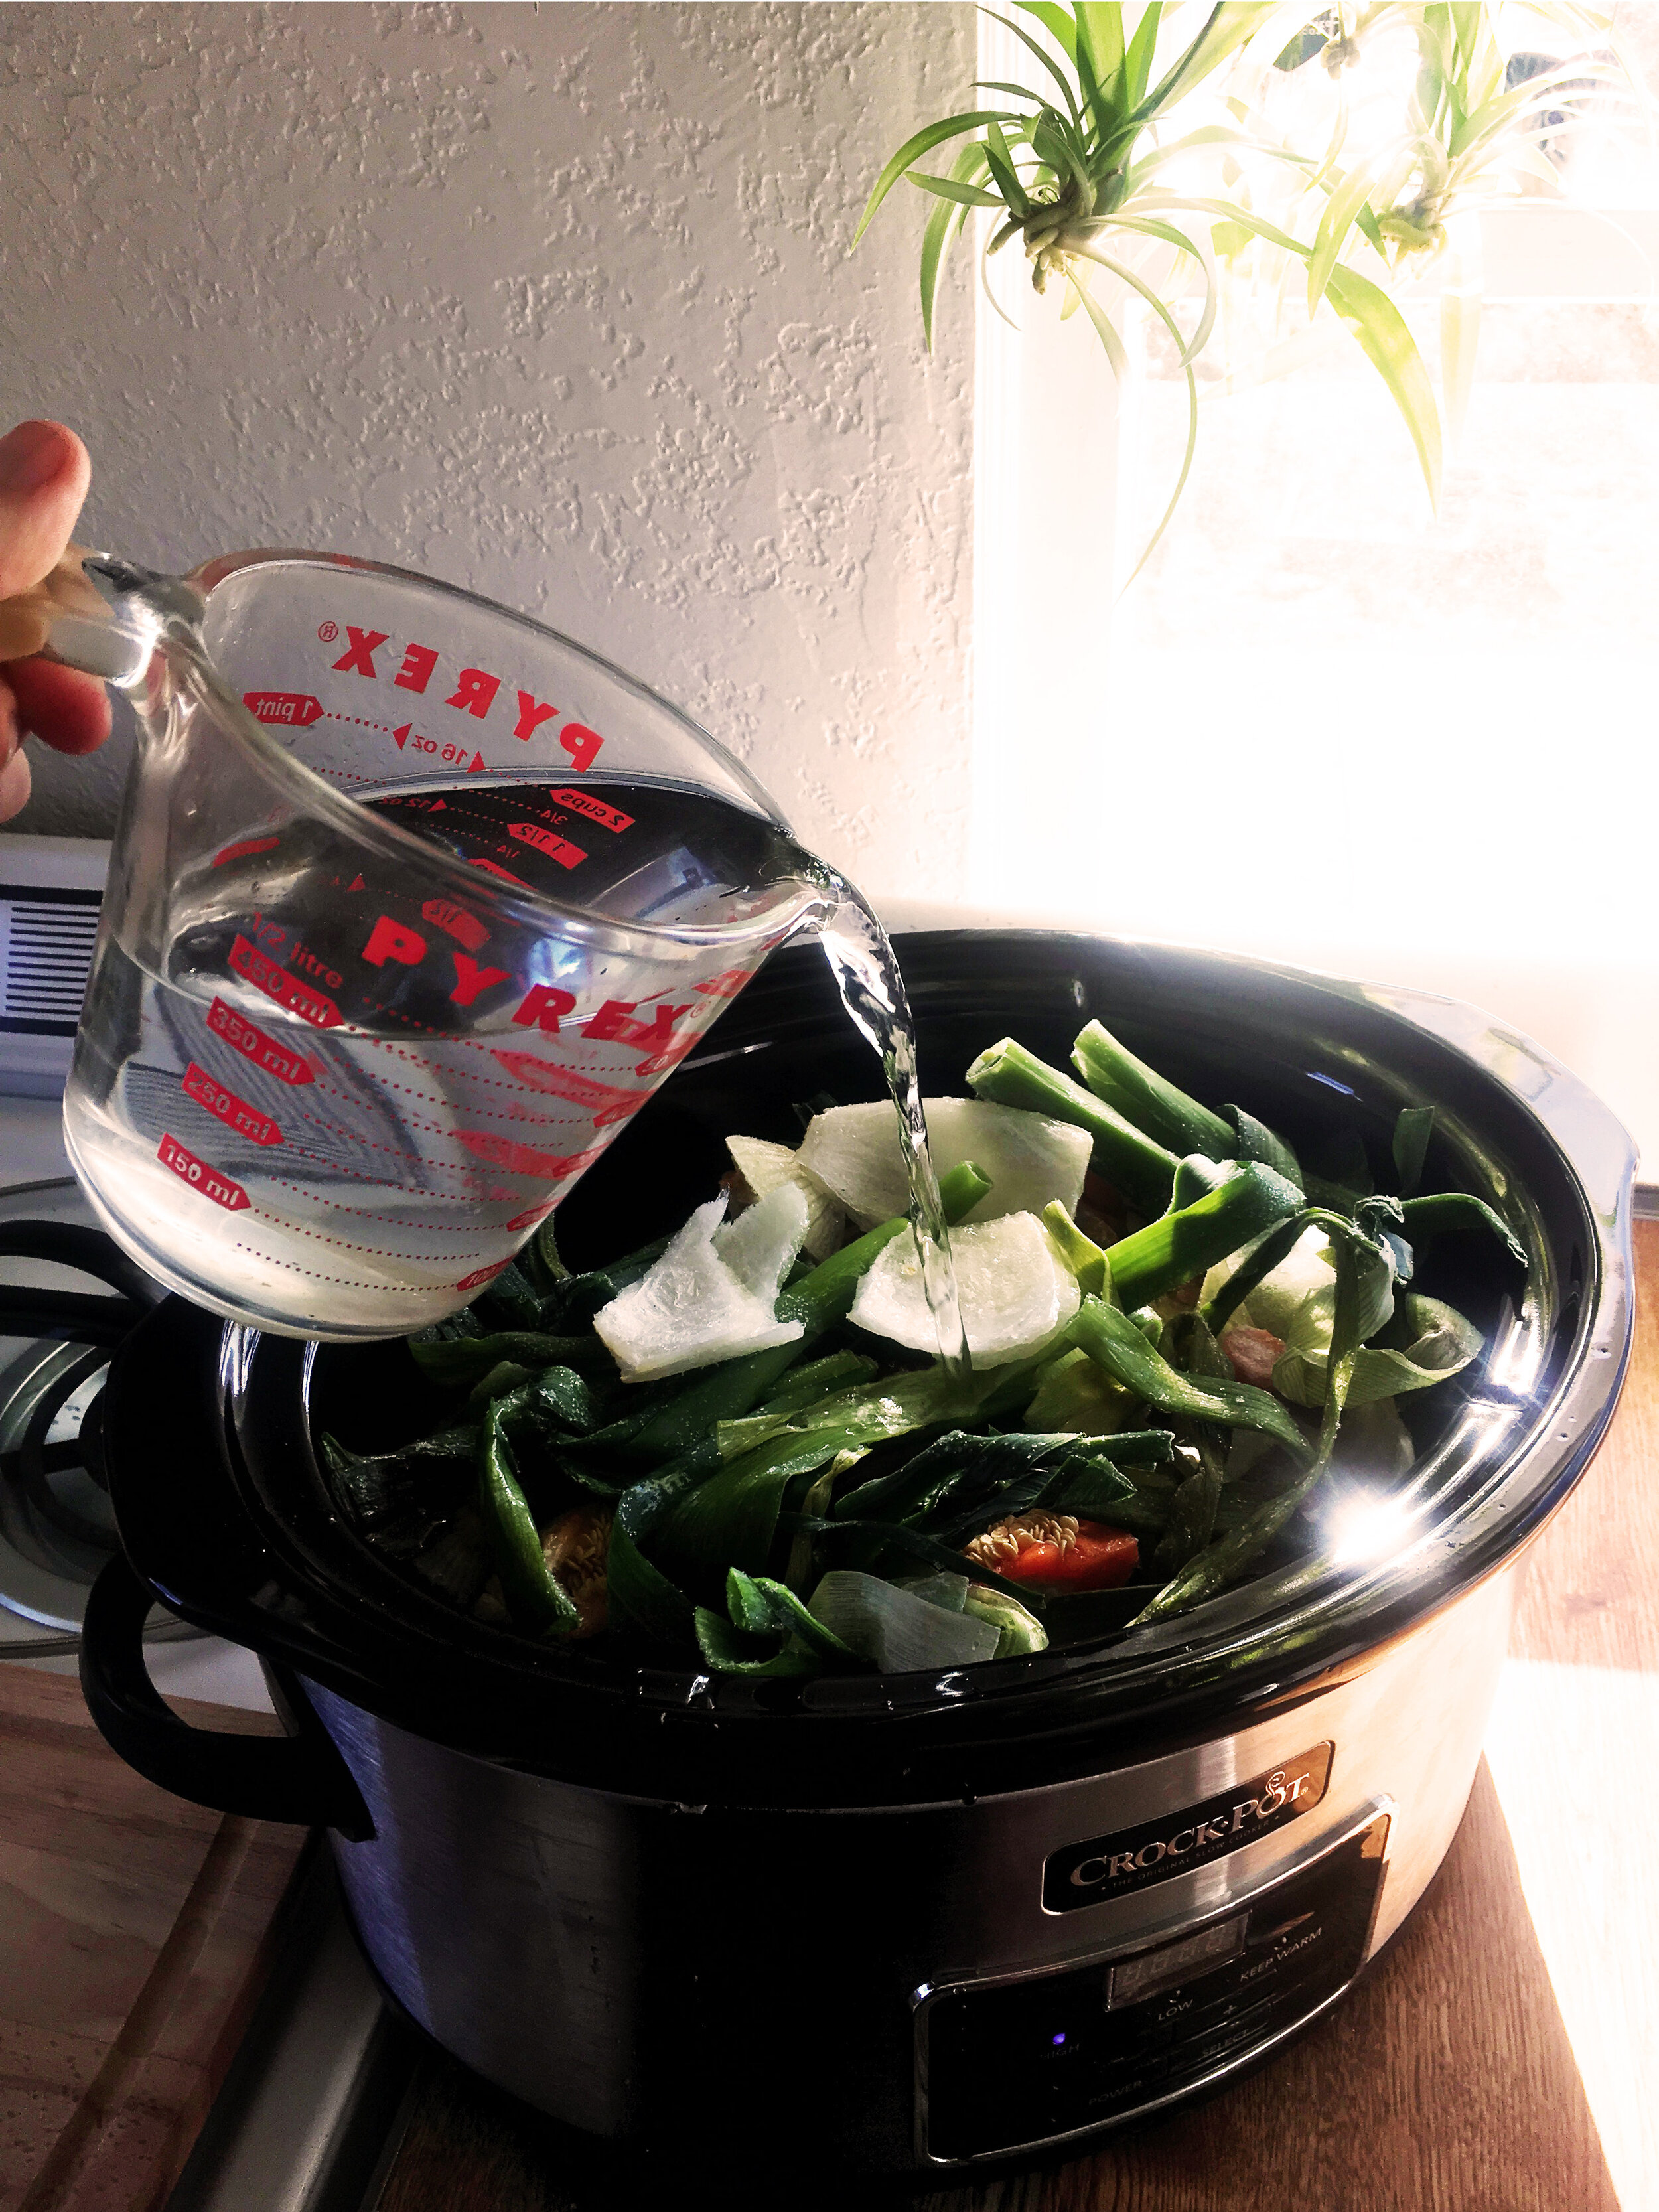
When your container is full and you’re ready to make stock, add the veggies to your pot. Don’t forget to peek in the fridge and grab any veggies that are starting to look too wilted or tired to use in other dishes.
If you need to, add fresh garlic, onion, or other key vegetables for the flavor you’re shooting for.
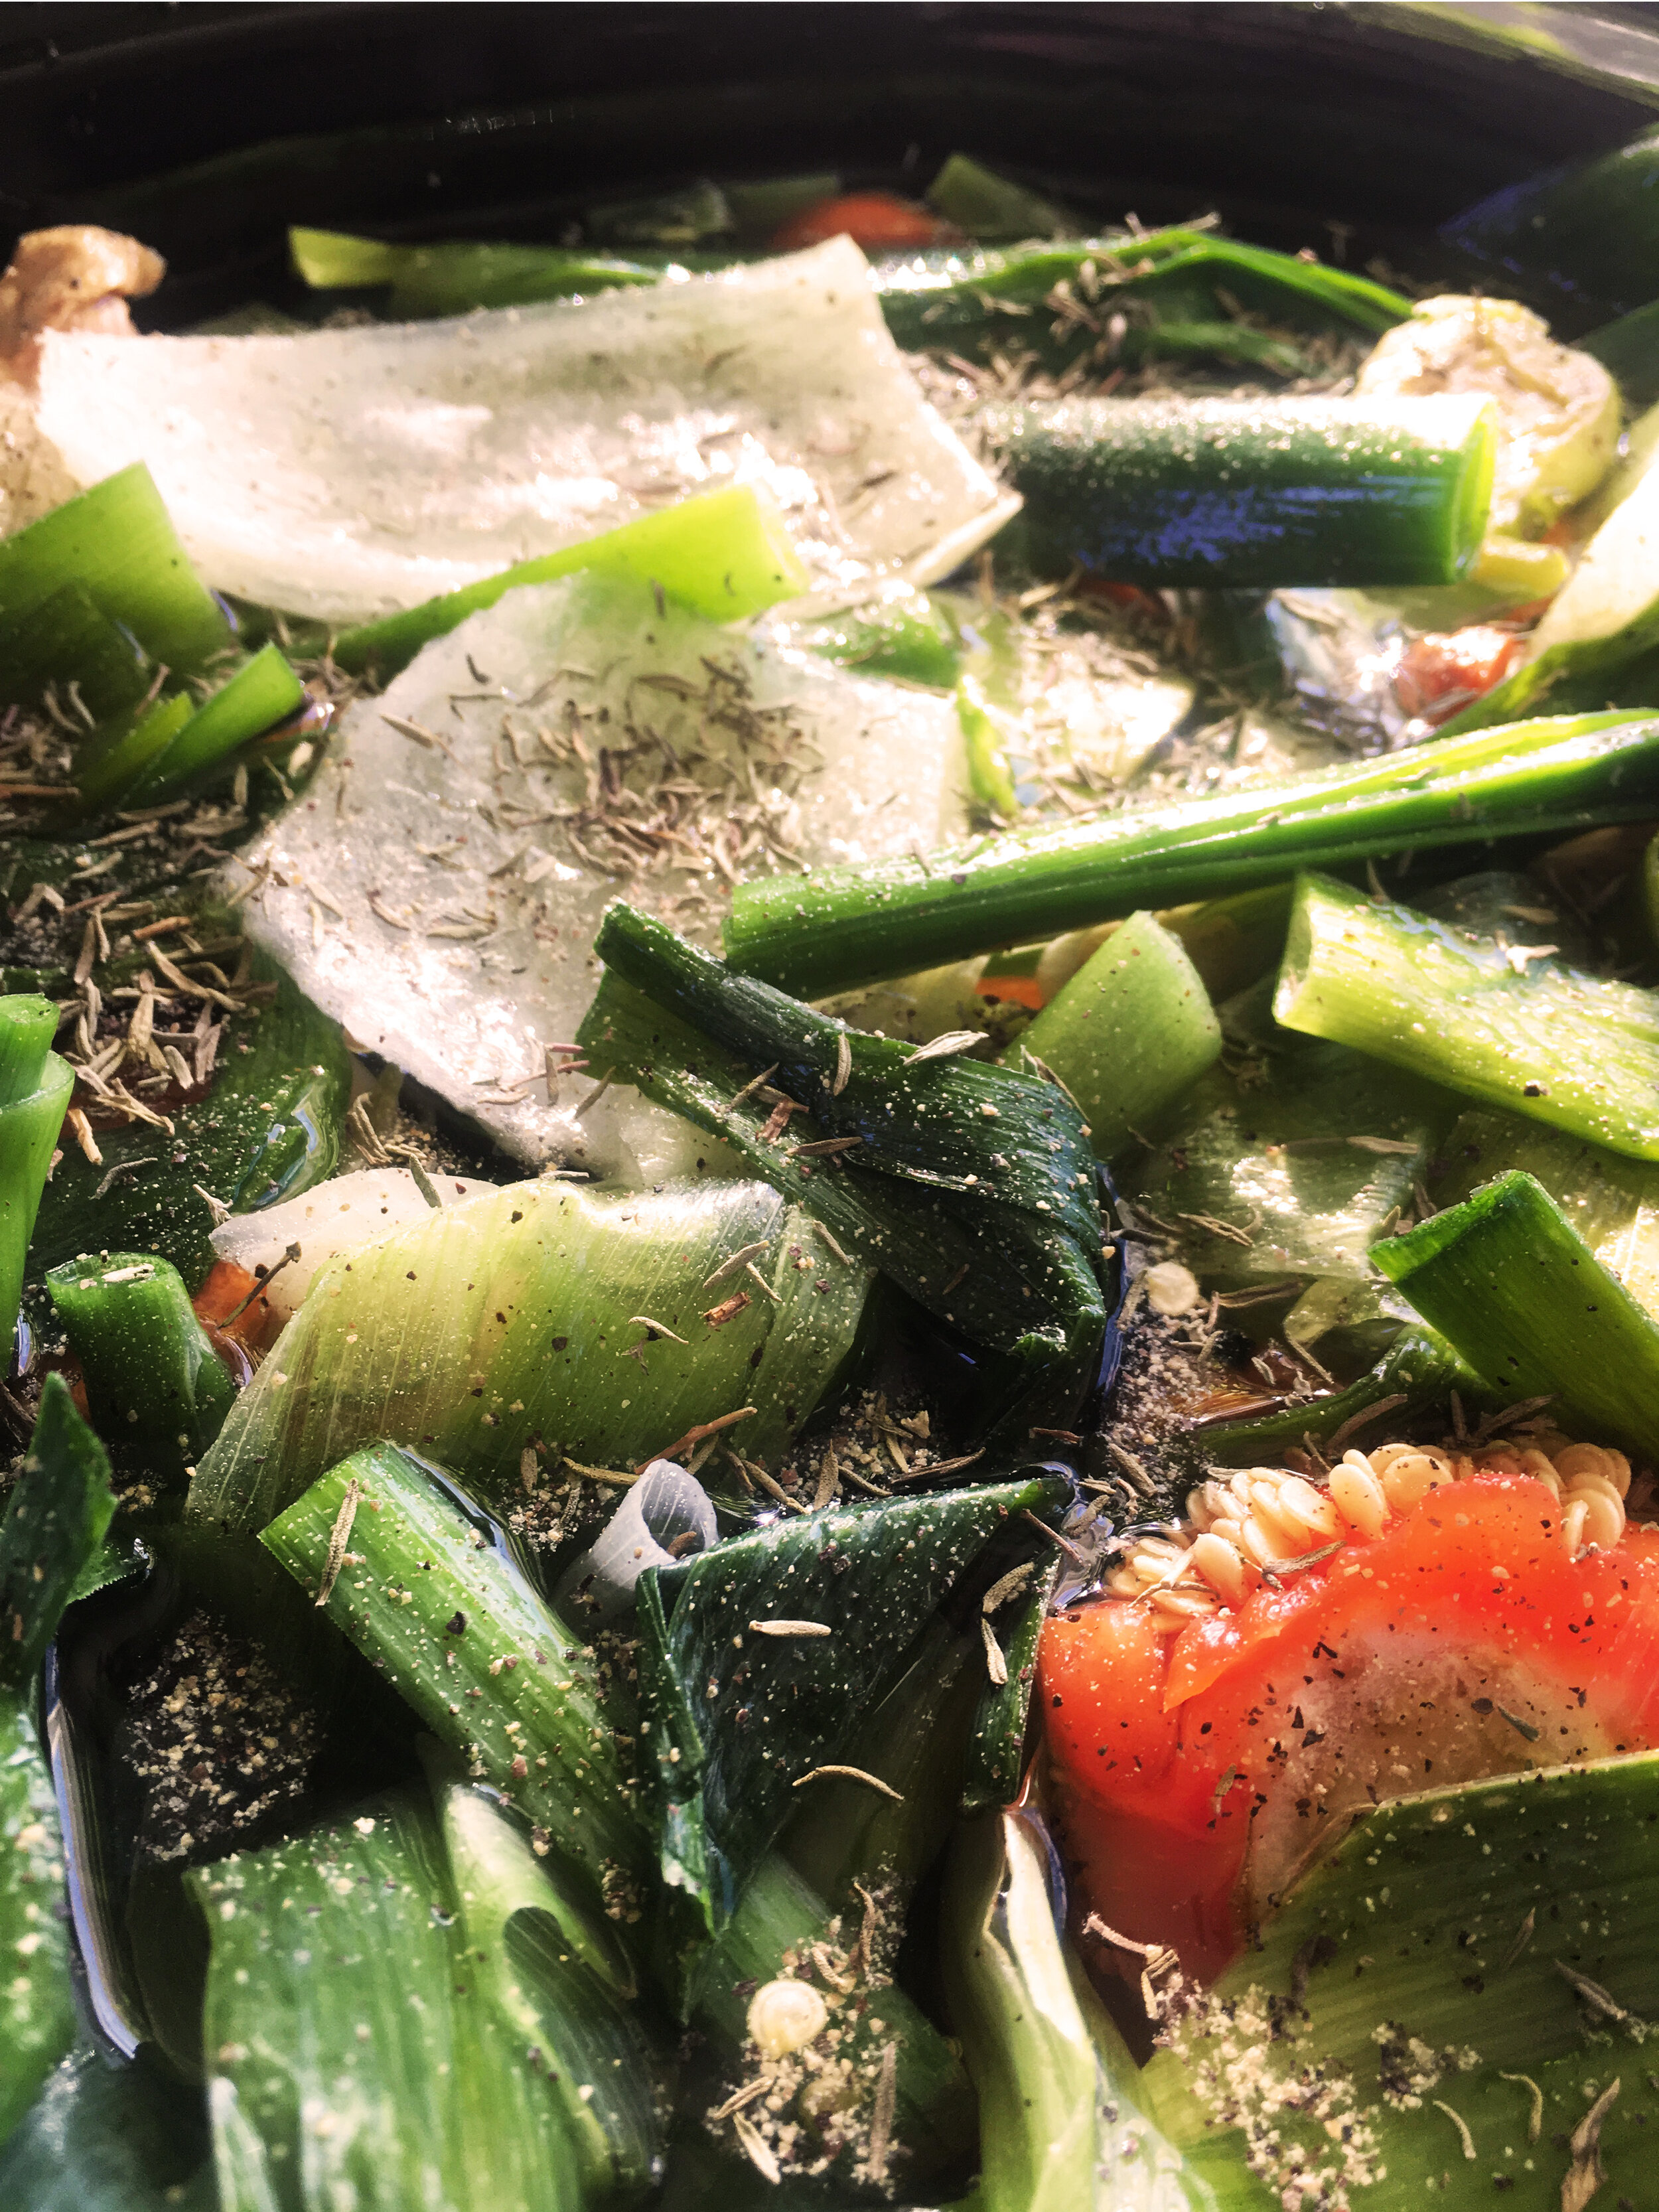
Add your spices and salt.
Pour in water until all of your vegetables are submerged.
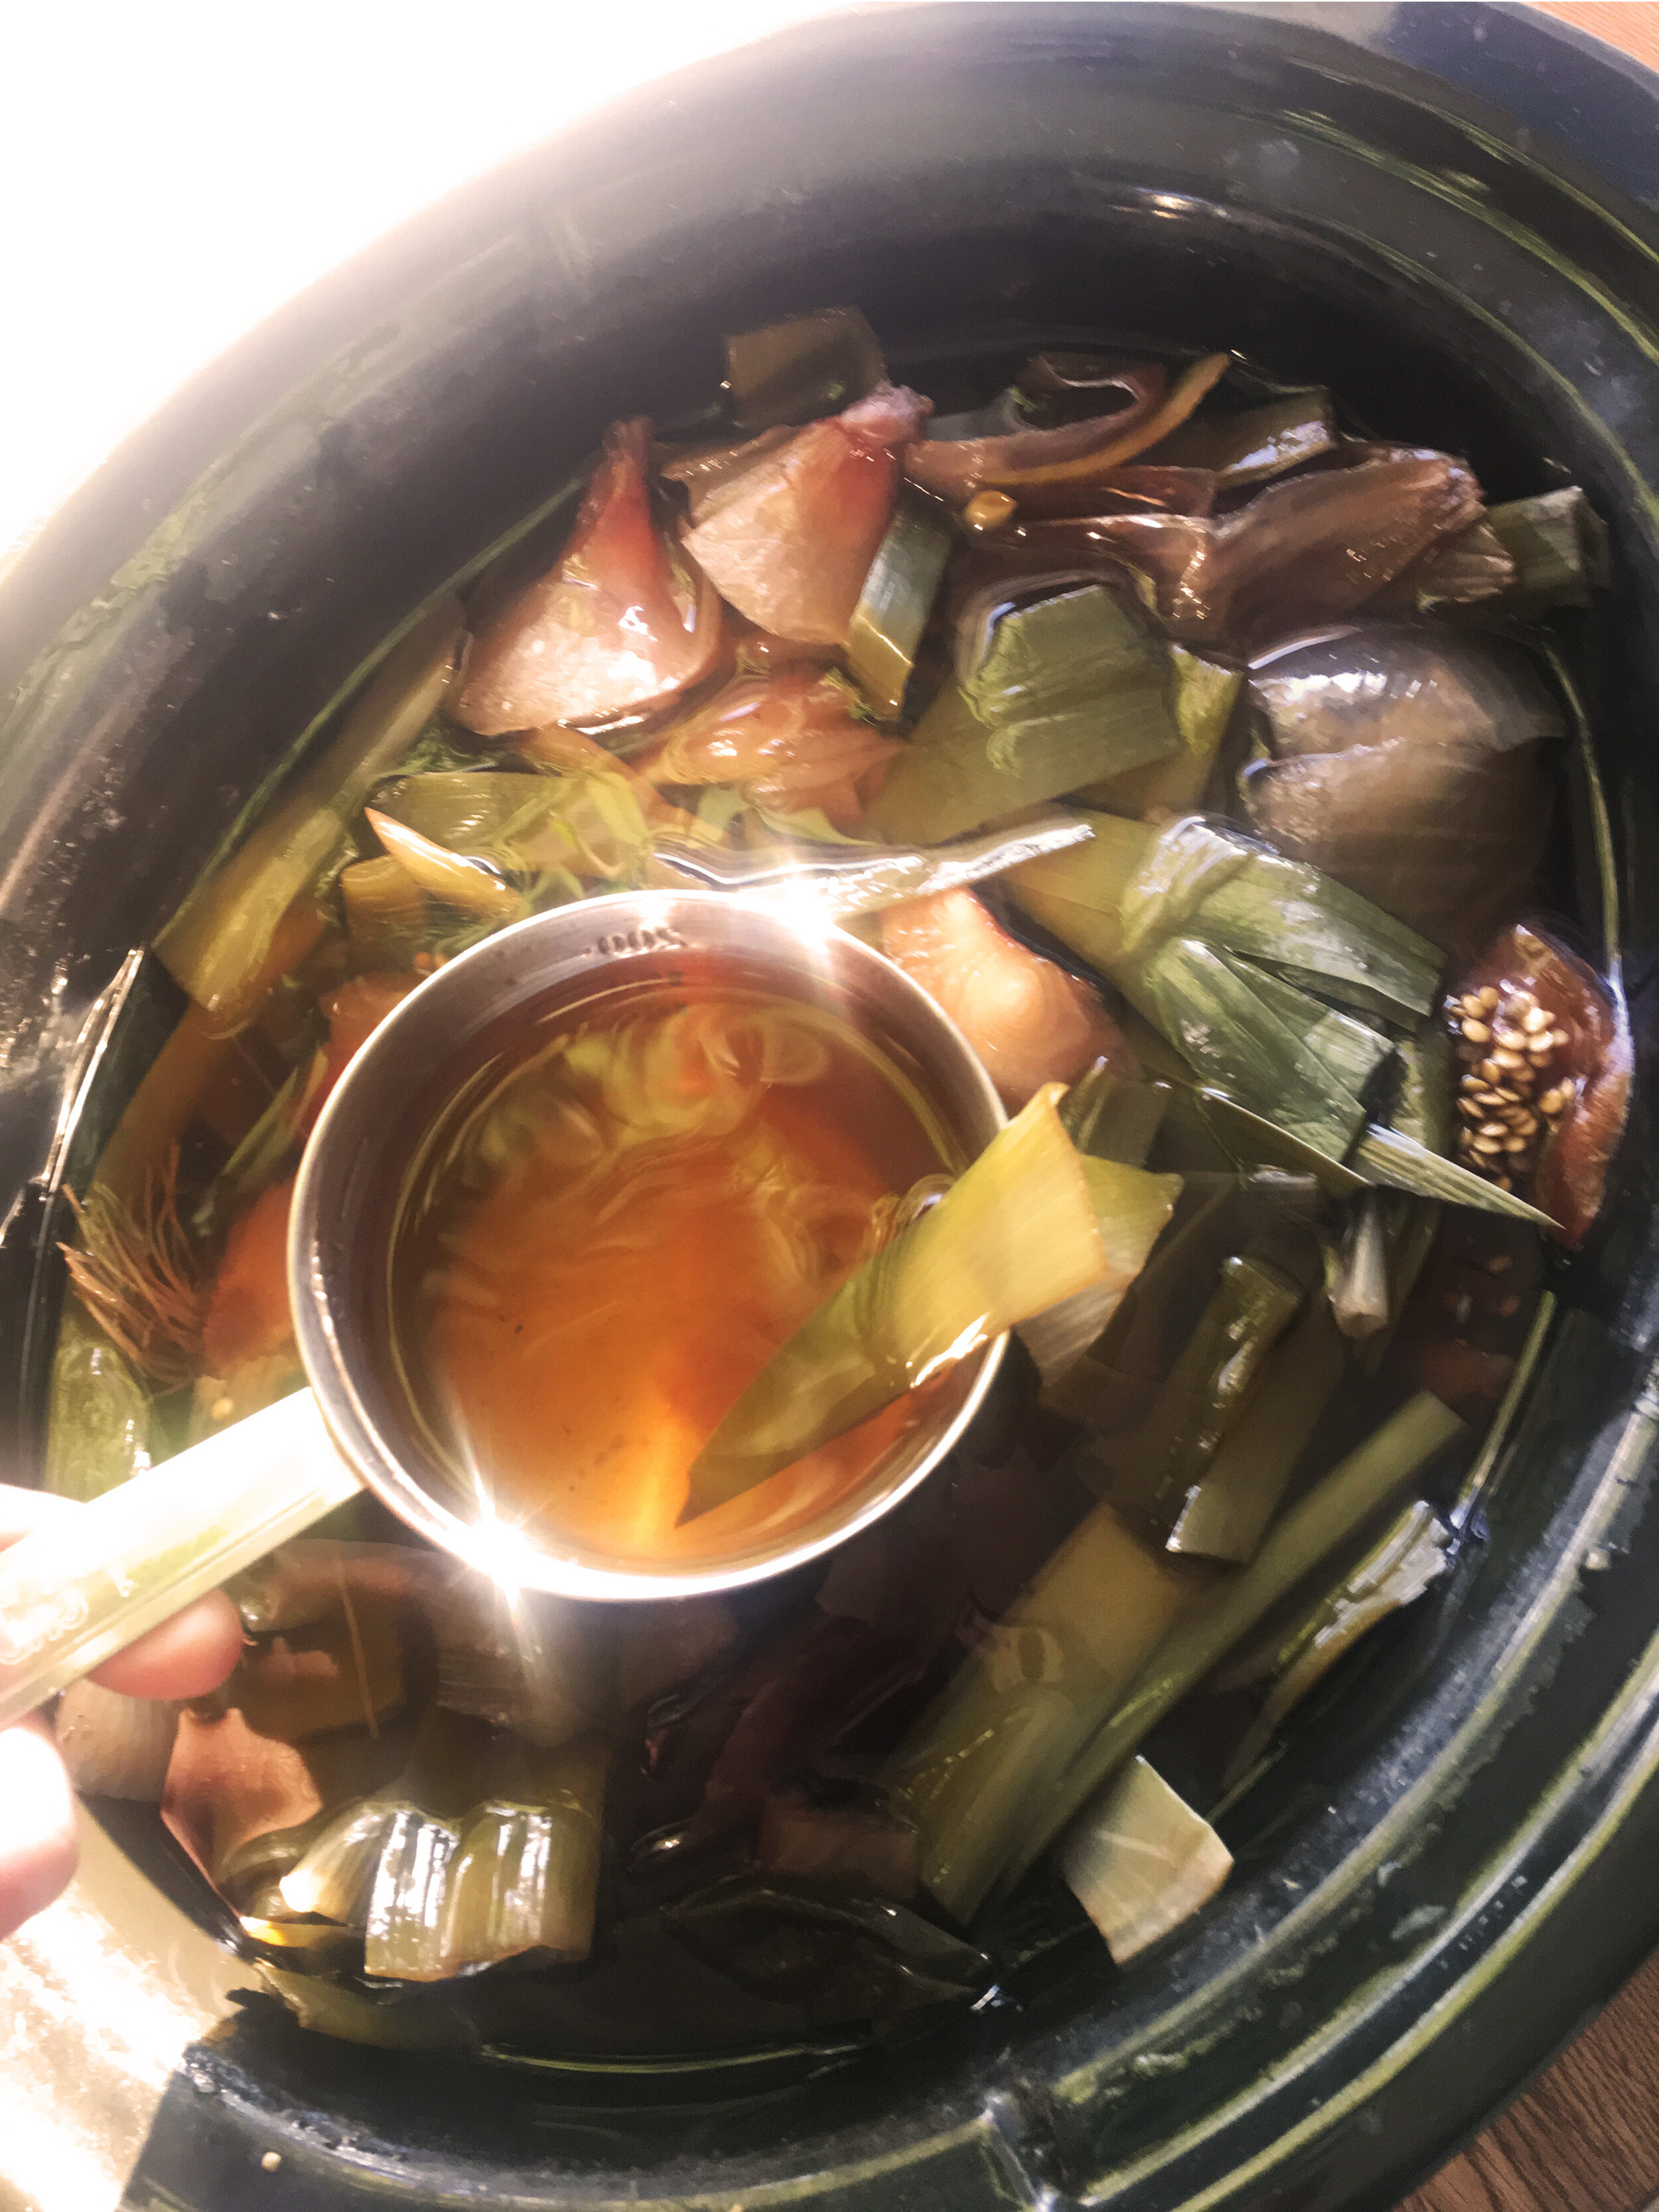
Heat the pot until it comes to a boil. Lower the temperature, cover and simmer for at least one hour.
Come back and check on your broth periodically. Depending on the aromatics of your vegetables, how much water you added, how dark you want your broth to be, etc. this can cook for up to 8 hours. Some people leave it on low all day while they go to work or sleep. We recommend making broth while you know you’ll be in the house, and checking on it regularly, adding spices, and tasting as it gets stronger. Skim small particles off the top of the pot with a slotted spoon to reduce impurities.
Salt to taste!
Filtration and Storage
Let your broth cool before adding to any plastic containers. Make sure you don’t have a major temperature difference between the broth and glass containers so they don’t break—eek!
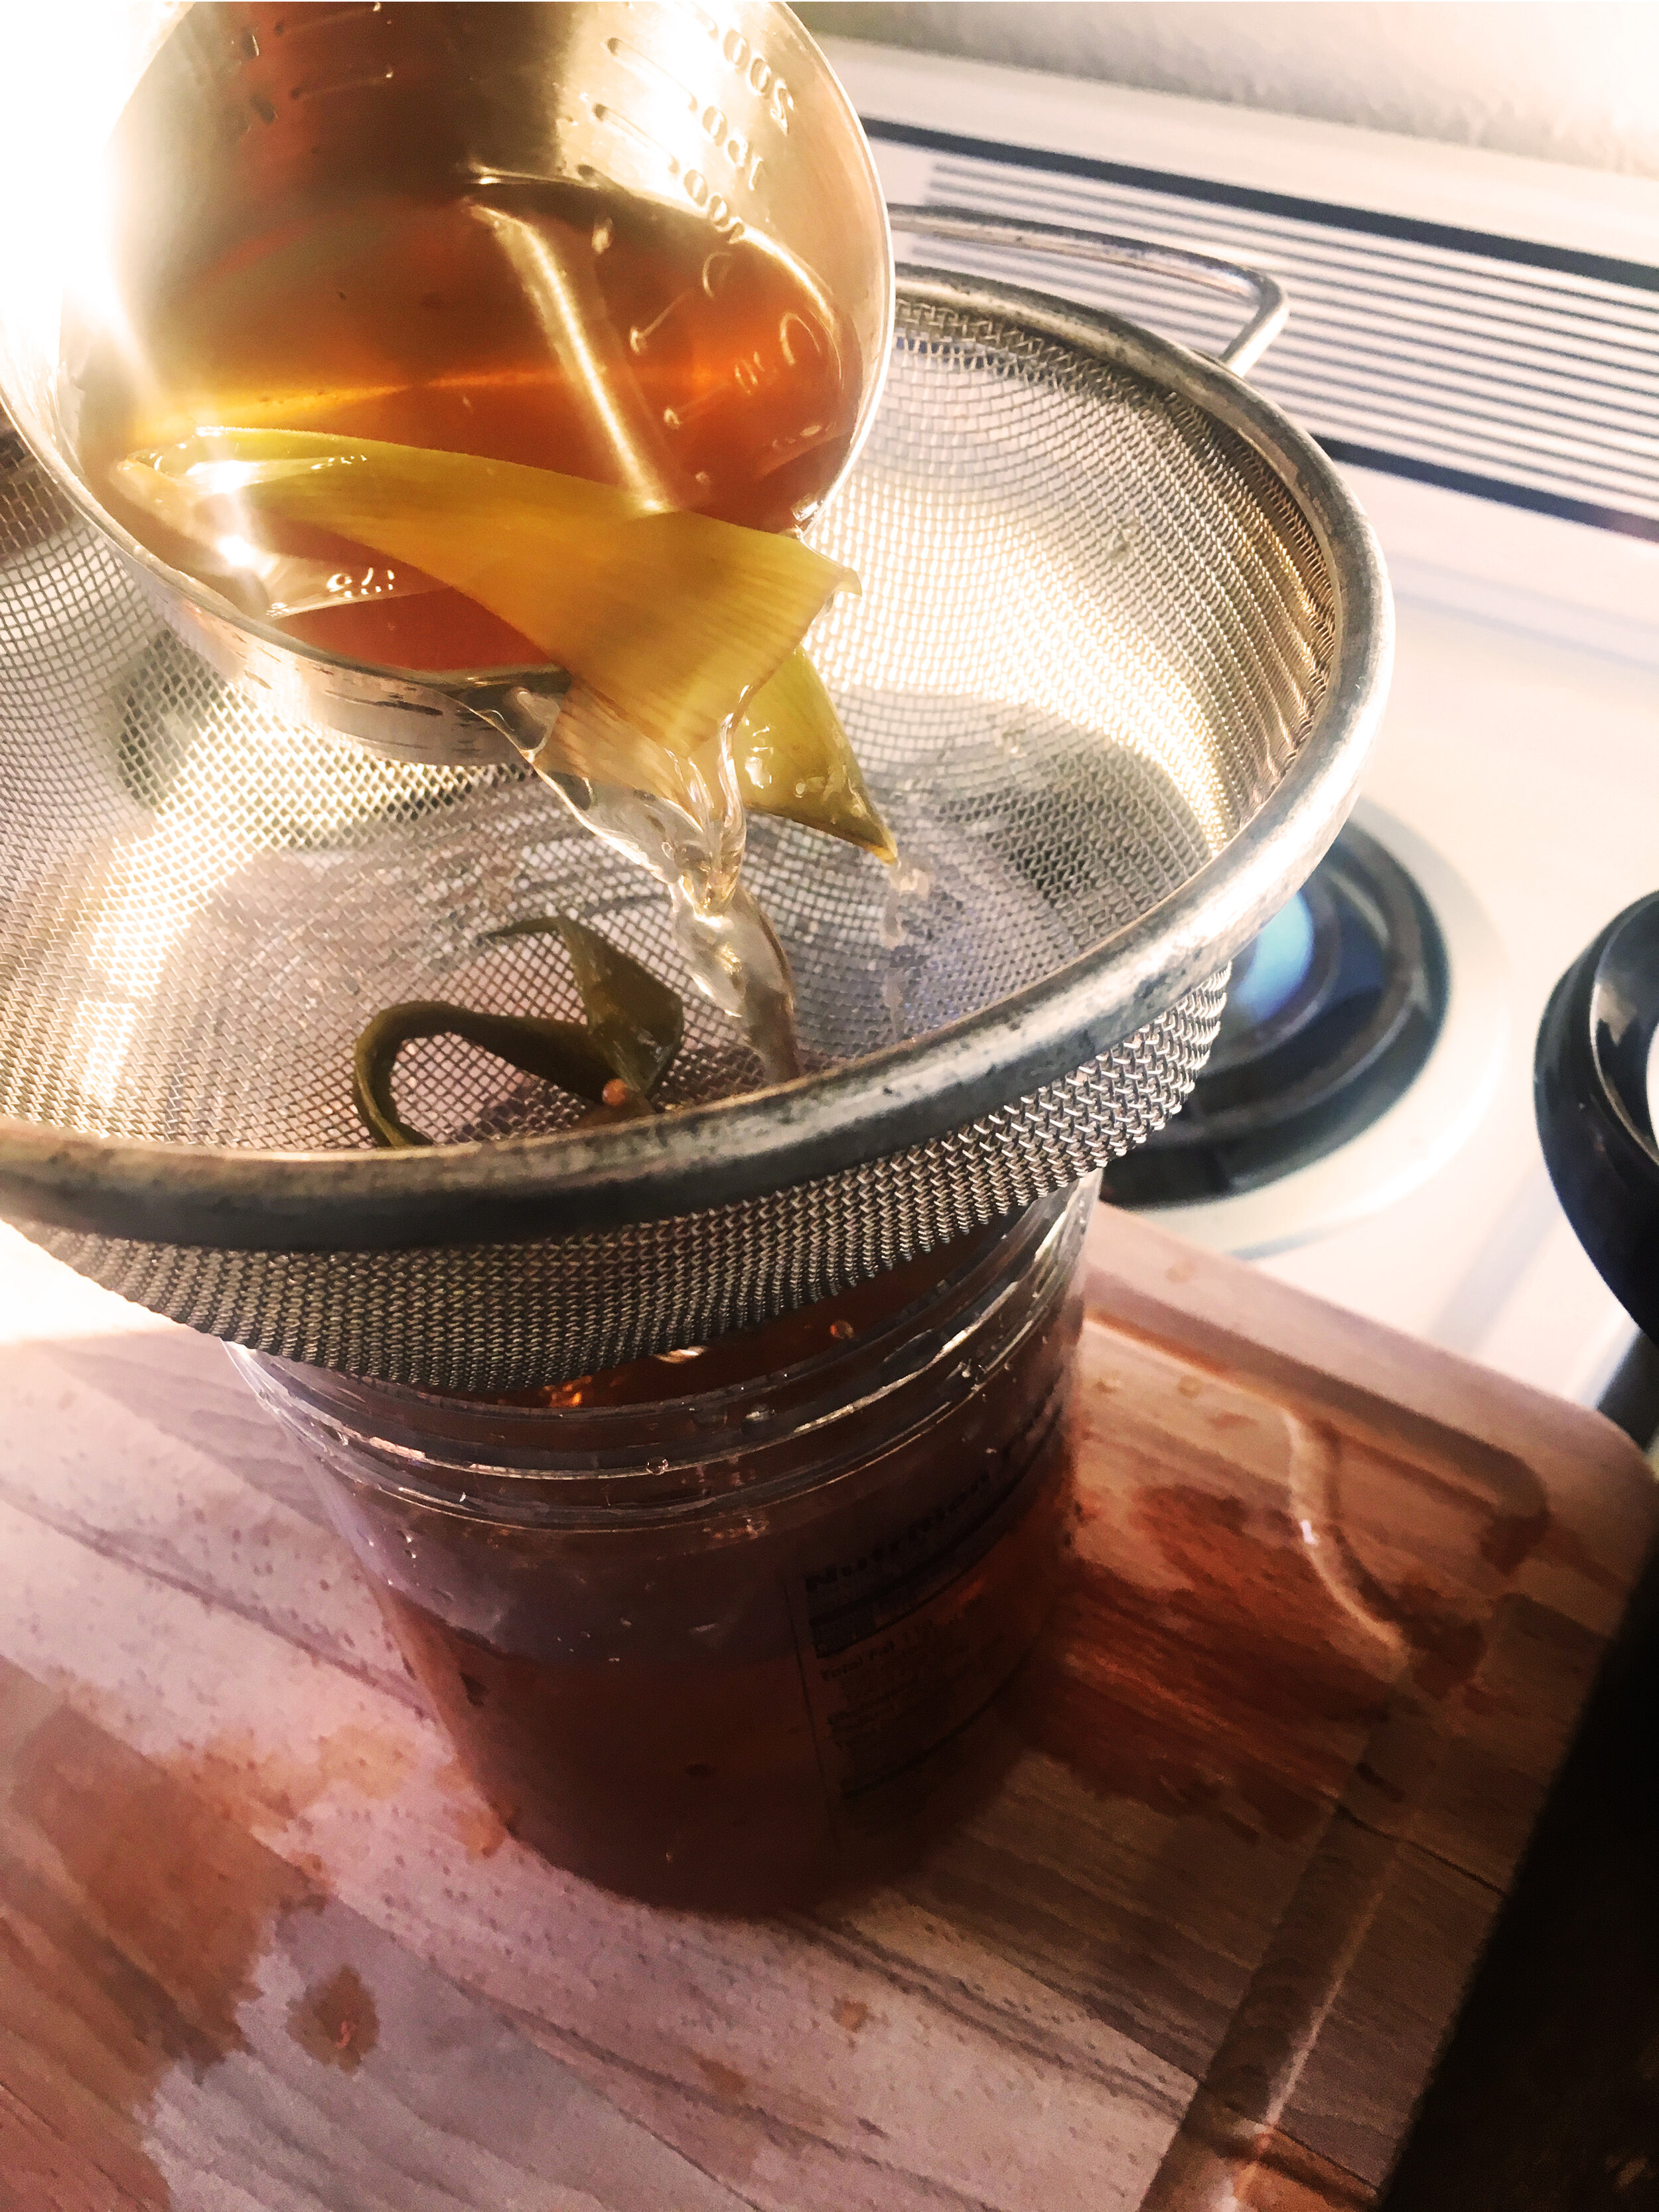
Before adding to containers you’ll want to filter your broth to remove vegetable chunks and any small spices or debris if you prefer. Use a slotted spoon to get all large pieces of vegetables out of your broth, and add them to your compost bin. Then pour the broth through your strainer into your container. I used a fine metal strainer but you could also use cheesecloth or even a coffee filter to get out the finest pieces if you’d like.
Refrigerate up to 1 week if you know you’ll be using it soon.
Freeze in containers and thaw them out when you’re ready. I like to freeze in ice cube trays and then transfer to containers once frozen. This gives me control over how much I want to use and thaw small amounts over time. Frozen broth is usually good up to 3-6 months.
If you have the materials, there are many tested canning instructions for canning your vegetable broth.
Best Practice
Look around for clean old containers like glass jars to reuse for storage. If you opt for a ziplock bag to store your veggies, make sure you treat it well and keep reusing it for as long as you can!
Avoid packaged produce, or really anything packaged for that matter. This is not to say that you’ll always have the option, but when you do, go for it! Normally you can find all of these ingredients in stores unpackaged, so take the opportunity to use your hands, smell the produce, build that relationship with your ingredients! Some garlics, potatoes and other veggies are sold wrapped or in multipacks, try to find them unpackaged when possible and look for bulk spice options in stores near you.
After you’re done with the veggies from this recipe, make sure to compost the scraps if you’re able. In home composting can be hard if you’re in a small space, urban area, or in a shared living situation, but be on the lookout for municipal composting options and we’ll have content on small-space composting coming at you soon!
When shopping for spices, look for organic and Fair Trade certified when possible. Many spices that we know and love are grown around the globe, which means they pass through many hands before getting to our kitchens. Fair Trade maximizes the positive impact for producers. Want to read more? Check out our article explaining food labels.
Plan ahead with your food purchasing as to try and avoid waste. While this recipe does help you use up produce that is getting old, ideally when you’re meal planning you can make sure you only buy what you use so nothing is at risk of going to waste.
Washing your vegetables before cutting and using is essential for making sure you’re washing off any dirt debris before making this recipe. Most fine filtering will get rid of particles, but it’s still important before you soak the veggies for multiple hours! The washing step is especially important in this recipe because so many essential ingredients (onions, garlic, etc.) are vegetables that grow in the ground. Washing can also help wash off fertilizers, herbicides, and other chemicals that may have come in contact with our food during production. While many of these chemicals may be more than skin deep, washing can help reduce how many of them enter our bodies. When buying produce consider organic options to further avoid the use of chemicals in our environment and our food.
Note: this is a recipe for vegetable stock because we like to promote plant-based eating on this platform as much as possible. If you choose to eat meat and find yourself with leftover bones or other parts of an animal, you can add those to make the most of that food as well. Nearly any animal that humans eat for meat can be used to make stock.
If you give this recipe a try, will you let us know how it goes?